Thursday, June 25, 2009

BUFFALO CHICKEN WINGS!


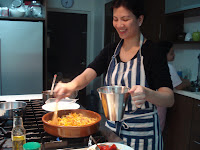
I was browsing through my food photos and found this. I did this for a food tasting a few months ago.  Since I cooked the wings for a group of tasters, I served the whole batch thinking that there would be some left for me, but it got wiped out in a blink of an eye. They commented that it was good and that was enough for me to know that I did something right.

This is what I served for dinner tonight, together with a taco salad and cheese quesadillas. Would've loved to have this with a mojito but didn't have time to get some mint. 


BUFFALO CHICKEN WINGS

       oil for deep frying


         1/4 cup butter

         1/4 cup hot sauce

         1 teaspoon garlic powder

1/4 teaspoon salt

        1/4   teaspoon pepper

coating:

         1/2 cup all-purpose flour

         1 teaspoon paprika

         1/2 teaspoon salt

         1/8 teaspoon pepper

         10 chicken wings

DIRECTIONS


1.       Combine the butter, hot sauce, garlic powder, salt and pepper in a small saucepan over low heat. Stir together and heat until butter is melted and mixture is well blended. Remove from heat and reserve for serving.

2.       In a small bowl mix together the flour, paprika, salt and pepper. 

3.       Heat oil in a medium saucepan to about 375 F.  

3.       Coat wings well with the flour mixture.

4.       Fry wings for 10 to 15 minutes, or until parts golden brown. Remove from heat and             immediately coat wings with the hot sauce mixture.     Serve with blue cheese dressing.                            

BLUE CHEESE DRESSING

1 cup mayonnaise

        1/2 cup sour cream

    1/2 cup blue cheese, crumbled        

1 tablespoon lemon juice

        2 teaspoon worcestershire sauce

        1/2 teaspoon garlic powder

        1/4 teaspoon salt

        1/4 teaspoon pepper

DIRECTIONS:

Combine all the ingredients in a bowl. Cover, and refrigerate for at least one hour before serving.

CHOCOLATE CRINKLES


Yesterday, we had taping for True Confections and did this in one of our episodes.... The Chocolate Crinkles.  I like everything about it...the crackly look of the cookie, soft and gooey texture and how it can last for days at room temperature.

The dough can also be stored in the fridge or freezer for days and you can just bake them as needed. I think I'll be making another batch of these for the weekend... you should too.     Happy Baking!

Ingredients:


3/4 cups oil

2 cups sugar

4 pieces eggs

1 tablespoon vanilla

2 1/3 cups all purpose flour

3/4 cup cocoa powder

2 teaspoons baking soda

1 teaspoon salt

1 cup confectioner's sugar


Directions:


1.  Combine oil and sugar in a bowl of an electric mixer.


2.  Add eggs and vanilla.


3.  In a separate bowl, combine all-purpose flour, cocoa powder, baking soda. 


4.  Place the mixture in the refrigerator for at least an hour  or until the dough is firm before using.


5. To bake, Preheat oven to 350 F. Shape the dough into 3/4-inch balls and roll in the confectioner's sugar to coat completely.


7.  Place the balls in a lightly greased cookie sheet or lined with parchment paper.  Arrange the balls about 2 inches apart.


8.  Bake the cookies until puffed and cracked on the top, about 10-12 mins.  Cookies should look undone and still soft in the center.  The internal heat will cook the cookies while cooling down and will keep them moist and chewy on the inside and crisp on the outside.  Cool completely.  


9.  Store in an airtight container.


Thursday, June 18, 2009

SEAFOOD PAELLA

One night, the girls decided to come over for dinner.  We were all craving for a paella but too lazy to go to a Spanish restaurant.  So we sent the driver to the grocery to buy our ingredients and this is how we did it.  A lot of people get intimidated in making it because it uses a lot of ingredients but if you follow the steps below, I guarantee you a good paella every time.

FOR THE INGREDIENTS:

 4            T                        extra virgin olive oil

1            c                        onions, minced

1            T                        garlic, minced

1            c                        chorizo, sliced

1/2            c                        crushed tomatoes

1            T                        sweet paprika

1            T                        colorante

1 1/2             c                        calrose rice

1            t                        saffron threads (diluted in ½ c hot water)

3            c                        chicken stock

2            pcs                        crabs

200            gms                        shrimps/prawns

200            gms                        clams/mussels

2            pcs                        pimiento – sliced

Instructions:

1.       1.  Saute onions in olive oil  on medium heat

2.     2.  Add garlic and sauté until fragrant.

3.     3.  Add chorizo

    A4.  Add crushed tomatoes

2.     5.  Add paprika and colorant

66. 6. Add rice, sauté for 2 minutes

1.     7.  Add the saffron water, then add the chicken stock

2.     Allow to simmer for 15 minutes

1.     8.  Add the seafood and arrange over the paellera.

      9.  Add the pimiento.  Cover and simmer on low until done, about 20 minutes.

  
Serve paella with lemon wedges.

Friday, May 15, 2009

FOREIGN CELEBRITY CHEFS IN MANILA

When Chef in Black Emmanuel Stroobant came to Manila, I was thrilled to come to the event.  He was doing a demo for USDA using California Raisins and U.S. Meats which was held last March at the Hyatt hotel function room.

Here's what he prepared:

U.S. Pork Short Ribs American Style and California Raisins Infused with Barbecue Sauce

U.S. Roast Beef Salad with Togarashi and California Raisins Dressing
Marinated California Raisins and Roasted U.S. Beef Rib Eye in Hay Crust

Oen Braised U.S. Pork Shoulder Butt Kakuni Style With Stuffed California Raisins and Onions

California Raisin Marine Au Cafe
 
Then last month, Ming Tsai came to Manila and did a demo for Kyocera at the Rockwell tent.


Here, he's talking about his experiences in Iron Chef.

 
And here we are with the Pastry Alliance of the Philippines goofing around with a test shot and here we are with Ming.


LADUREE MACAROONS

This lovely box was delivered to my doorstep the other day by my mom who had just arrived from Tokyo.  She went on a trip there for ten days and since we weren't able to join her, she made sure she brought something back that I would really love.

I would receive a box of these lovely macaroons when friends would come back from Paris.  I have to tell you, once you take a bite of these, you'd never want to try any other macaroon anymore.  I see a lot of these macaroons being sold at bakeshops here but they really don't have the same texture and flavor of the original one...which is this one.  The flavor I love the most is the pistachio and the raspberry.

Later this afternoon, I'm going to invite some friends over for a tea party.  I'll be serving scones with cream and jam, little tea sandwiches and these macaroons.  Come on over and join if you can :-)

Saturday, April 25, 2009

THE COOKIE MUSEUM

After our dinner at the No Signboard, we headed to this place called The Cookie Museum. It's a place that specializes in different varieties of cookies. They have about more than 30 flavors.

They also have a wide selection of teas. In the menu, they have a description for each flavor. I ordered an herbal tea with lemon and ginger. The lady then brought and served our teas in porcelain tea pots, cups and saucers. After a sip of our teas, the lady went to our table again with a trolley filled with airtight containers and inside the containers were miniature cookies as big as a dime.


She then gave us this menu that had all the different flavors of their cookies and they were all available for tasting. We started off with the one with the rose petal. It tasted very delicate and feminine, then after that, we had the cookie with lavender, it was soothing and very relaxing. I could imagine eating it with chamomile tea. Then next came the one with the blueberries, then next, with the lemon and so on... all of them tasted good. I wish they had a sampler box with all the flavors but unfortunately, they only had a box for each flavor at a $42.00 each. Pretty expensive but I guess the packaging and the quality ingredients that they used for the cookies justifies the price.
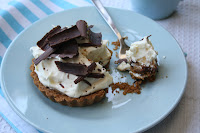
We didn't stay long in the place. We were only given 45 minutes to enjoy the whole experience as they were already on last call for the evening. I found the Cookie Museum very interesting and unique. I wish they had one like that in Manila.

YUMMY PHOTO SHOOT

A couple of weeks, I had a date with Yummy Magazine for a photo shoot.  We did about five recipes and although it was tiring to be doing them in one day, I have to say that I had fun too.  It was a challenge to be working on a time table, making sure that we still had enough natural light for the food shots.  

While David was taking pictures of the Yummy baked goodies, I took out my camera to take pictures as well including the crew in action. So here's what's coming out next on the Hey Home Baker column of Yummy Magazine... 

Banana Chocolate Chip Bread,  Peach Crostata
Self Saucing Chocolate Pudding,
Dayap Cake,

and the famous Banoffee.  So don't forget to get your copy of Yummy Magazine every month!